Just a little case study of how I effectively "lost" some wooden panelling for a customer, as part of a much bigger hall, stairs and landing makeover project.

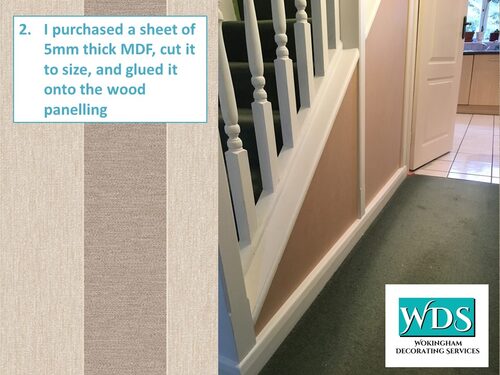

Just a little case study of how I effectively "lost" some wooden panelling for a customer, as part of a much bigger hall, stairs and landing makeover project.
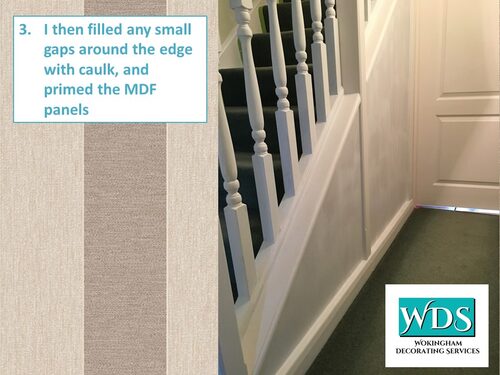
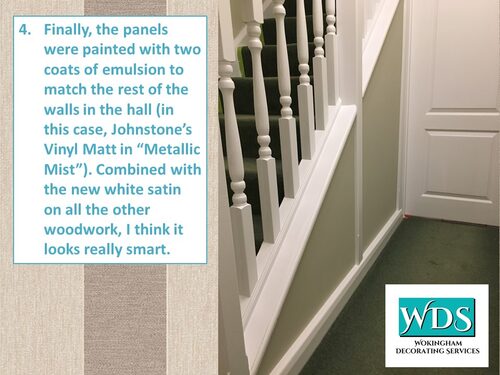
When decorating becomes as much about solving problems as aesthetics. This project took a while to complete, but it was important to follow the correct process in order to achieve not only the look that the customer wanted, but also to make it work from a practical perspective.
The front room of this period property is a decent size and had bags of potential, but being an older building the walls are poorly insulated, and were papered with a textured liner. When it was cold outside moisture condensed on the walls, soaked into the paper, and became a magnet for mould. So I stripped off the paper, only to find that the plaster beneath wasn't the best (no big surprise there!).
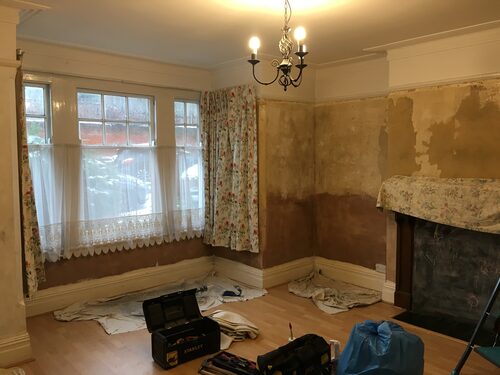
So I filled it, rubbed it down and sealed it, so at least we had a decent starting point, and then applied a thermal liner to the exterior walls. This acts like a thin layer of insulation, making the walls feel warmer and so hopefully stopping the condensation problem. I then re-applied the textured paper over the top of this to recreate the period look and feel.
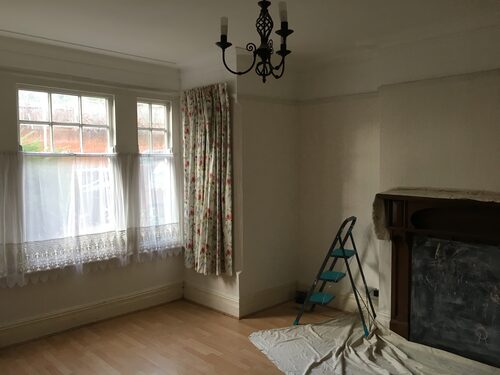
Finally the room was painted (ceiling, walls and woodwork). A real "labour of love", but at last this lovely room is beginning to live up to its potential, but still feels very much "in keeping" with the rest of the property.
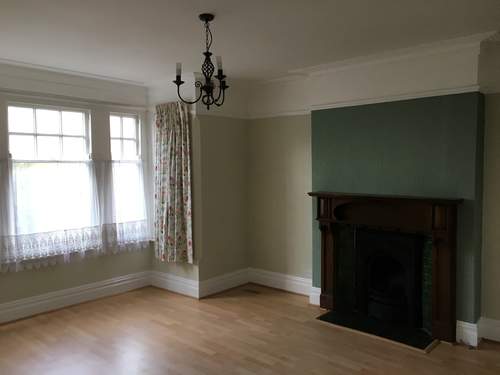
Colours used on walls: Dulux Trade Vinyl Matt in Cornish Clay (main walls) and Sage Green (chimney breast), both from the Dulux Heritage collection.
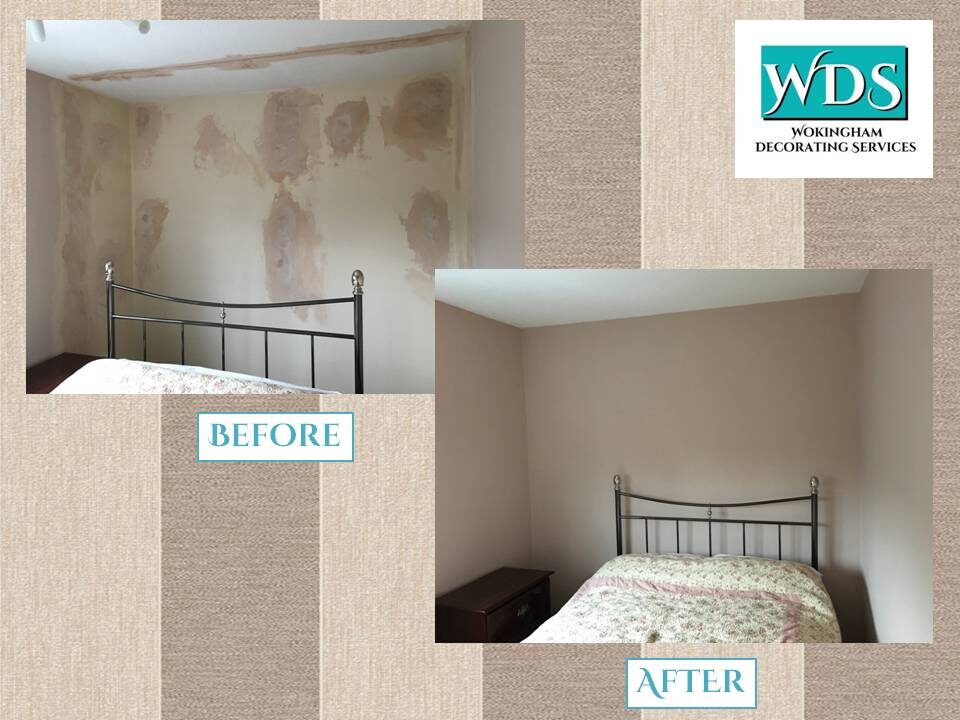
My customer had had some fitted wardrobes removed from her bedroom, which left the walls and ceiling in a bit of a mess. After some repair work by a local plasterer, I was called in to finish off the job.
Sharing a house with a lot of other people has its problems. Not just the "who used the last of the milk?" or "who ate my biscuits?" type of problems. The more people you have in a house, the more everything in the house is subjected to wear and tear. Often the bathroom can be the biggest problem area. Apart from the difficulties of booking a time in the shower so you're not late for work in the morning, if you have a lot of people sharing one bathroom/shower room, the steam and condensation can lead to all sorts of problems. Unprotected wood and mdf can act like a sponge and absorb moisture from the air, causing them to swell and expand. Walls and ceilings are permanently damp, often leading to unsightly stains and mould.
It was just this type of situation that I was called in to deal with recently. Sorting it out is actually relatively simple, but not as simple as just trying to paint over it with ordinary emulsion. But taking the correct, simple steps (in the right order) can make a dramatic (and long lasting) difference.
The first thing to say is that these problems often occur when there is inadequate ventilation in the room. A good quality, high capacity extractor fan is designed to pump all the warm, damp air out of your bathroom, which will go a long way towards reducing the problems. Prevention is always better than cure. I don't have the necessary qualifications or insurance to start installing electrical items in bathrooms, but my first recommendation would always be to look into a good extractor if you have a damp/mould problem caused by too much atmospheric moisture in your bathroom.
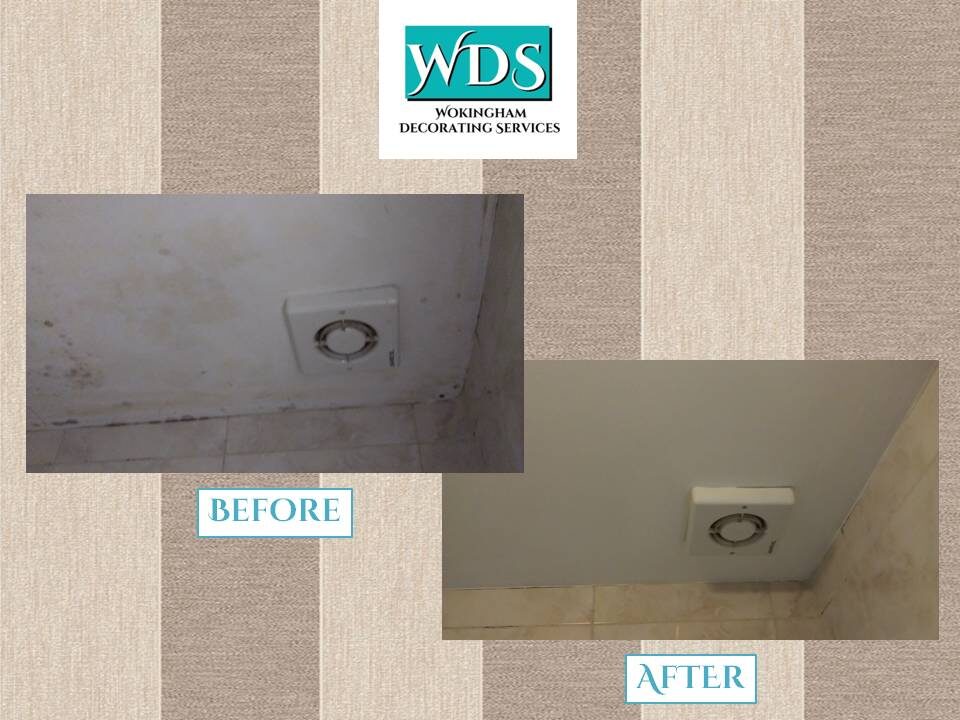
The first step is to kill off the mould. Mould is a living organic organism, and simply painting over it will not get rid of it - it will come back. Mould treatments are affordable and easy to get hold of. They used to be of the "apply with a brush and then wipe off" variety, which inevitably meant, if you were working on a ceiling, that at least half of the chemical treatment ended up running down the brush, over your hand, down your sleeve.... Fortunately, many are now available in a pump-action spray pack, which makes life much less messy. So simply spray on the mould treatment, wait (if/as specified in the instructions), and then wipe off. When I say "wipe off", I would use a damp cloth, and apply a reasonable amount of elbow grease, rinsing the cloth regularly, to try to get the area as clean as possible.
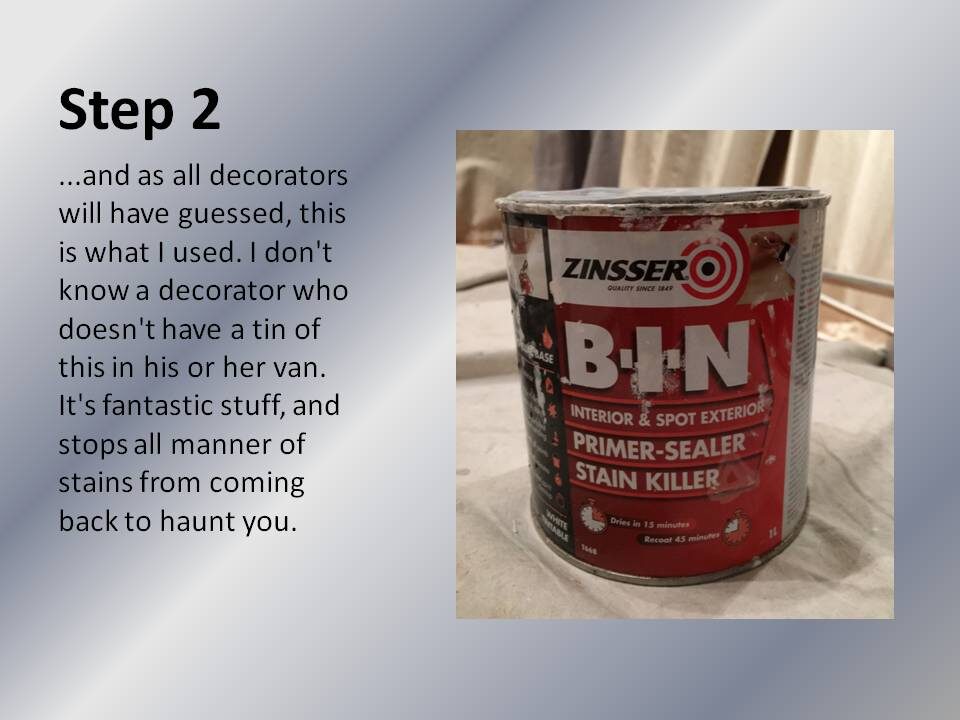
After the mould treatment has been applied and cleaned off, you should see a dramatic difference, but there will probably still be some staining present caused by the mould. Again, unfortunately simply painting over this will not solve the problem - the stains will almost certainly bleed back through your paint. So the next stage is to block them out with a stain-blocking primer. The two most widely used in my experience are Polycell Stain Block, which comes in a handy aerosol, which is great for small areas but can get expensive if you are covering a larger area (and you have to be careful where the spray is going!), and Zinsser B-I-N, which all decorators love!
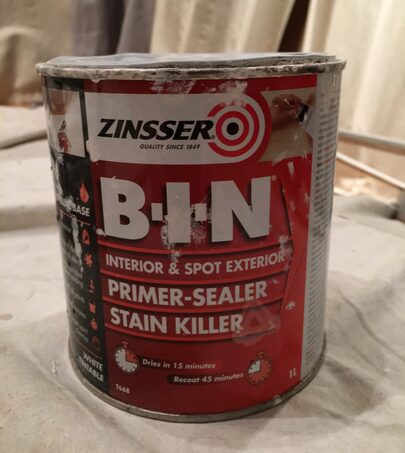
B-I-N is applied with a brush, dries quickly and covers really effectively. It's great stuff - the only thing to be aware of is that nothing will get your brush clean afterwards apart from meths, so make sure you have some in before you use the product.
So now the prep stage is complete, and it's time to paint the ceiling. Zinsser, the makers of B-I-N, have now brought out mould-inhibiting paint. Many other manufacturers do them too, but being a big Zinsser fan I was keen to give theirs a try. It's called Perma-White, and it just goes on like regular emulsion. Two coats and you're done - problem solved!
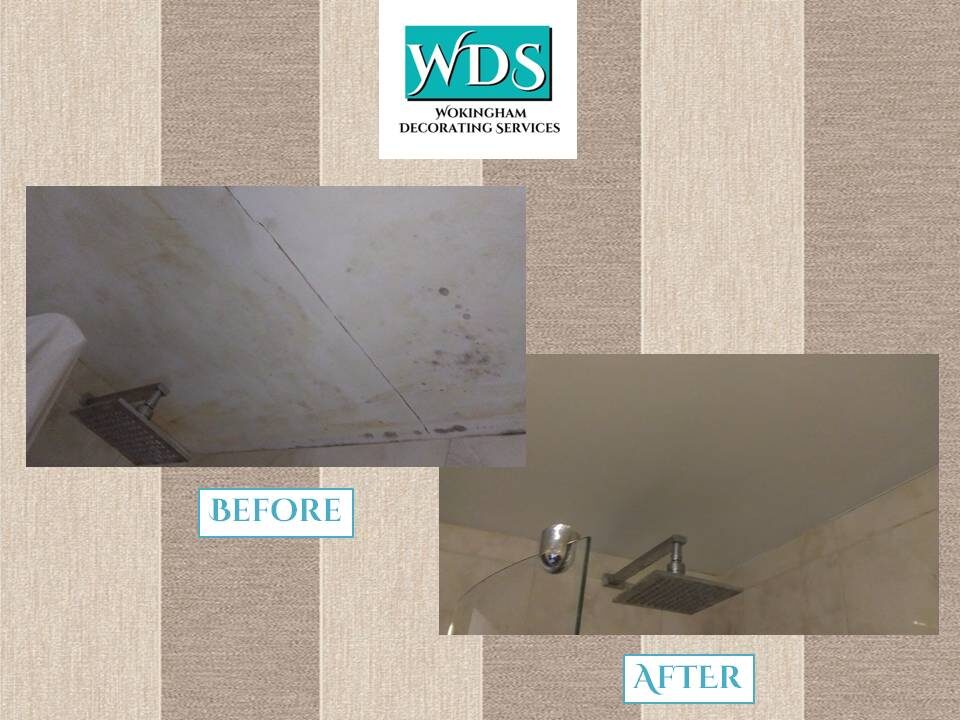
One note of apology about the photos - when I took the "after" shots, the light was very different, which makes the ceiling look grey. It really wasn't, it was crisp white, but unfortunately my photographic skills aren't as good as my decorating ones!
This was a fun project that resulted in quite a transformation for the clients' bedroom.
The biggest challenge was the fact that the wall that was destined to be the feature wall, with the clients' carefully chosen wallpaper, was in a bit of a state, due to there having been fitted wardrobes fixed to it in the past. So a lot of filling and sanding down and general making good was needed before we got to the wallpaper.
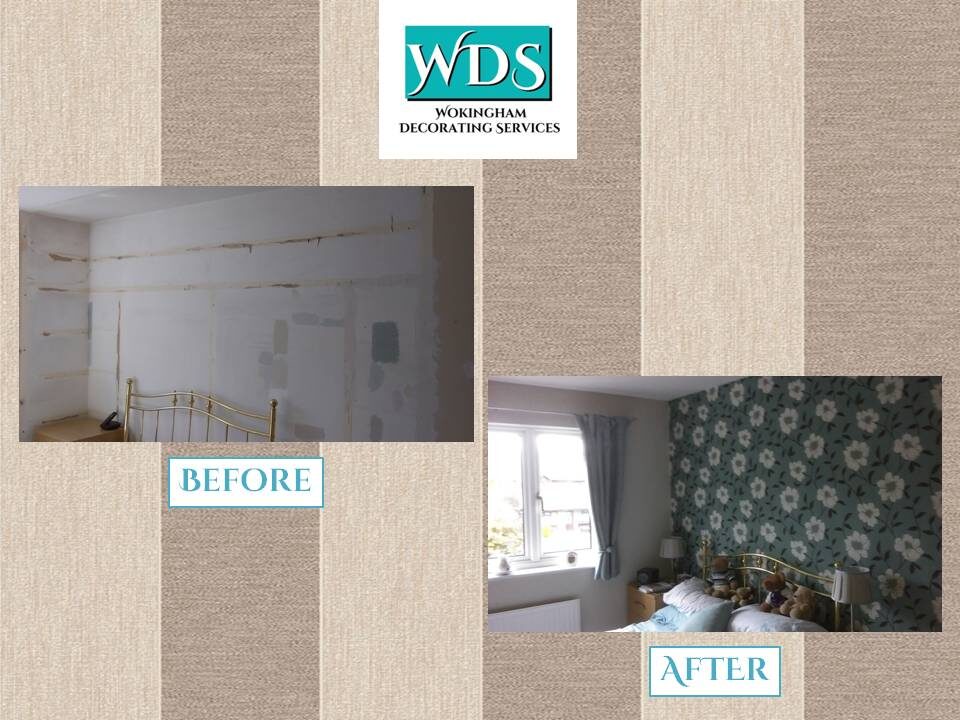
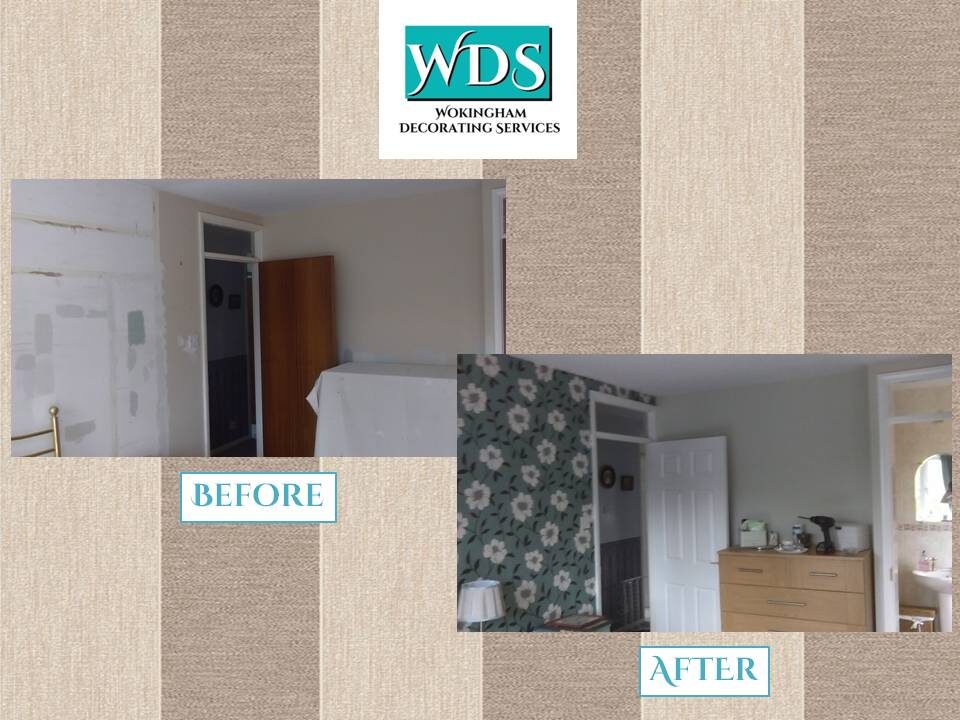
But once the prep was done, the real transformation started with new doors, a nice neutral shade on the non-feature walls, crisp white paint on the ceiling and woodwork, and then the wallpaper to finish off the room. This is why I love my job - being able to look at the "before" and "after" shots and thinking, "Wow, I did that!".
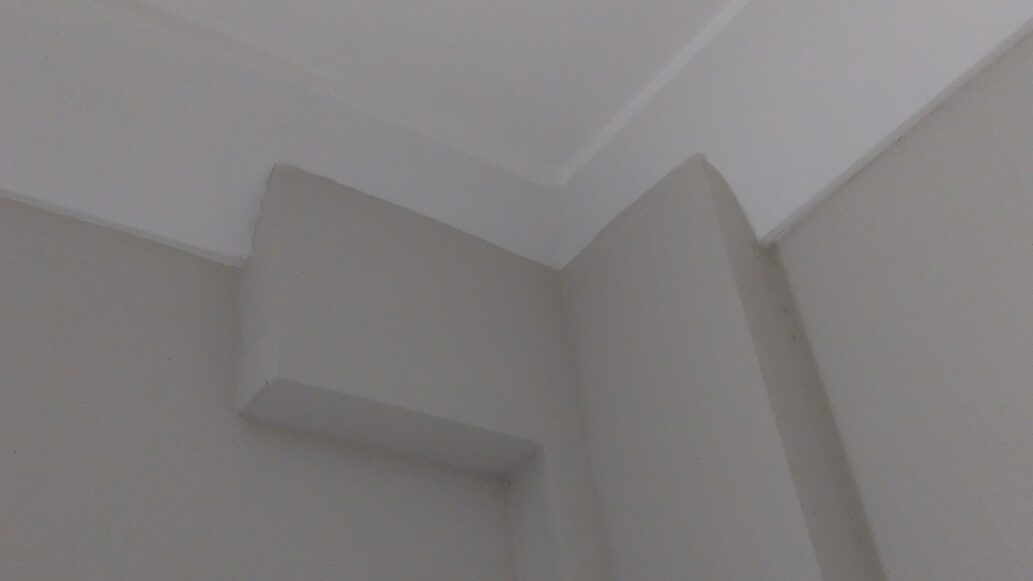
This is not a general rant against builders! There are some excellent builders around who do a really professional job and take a lot of pride in their work. I'm delighted to have worked with some of them. But on this particular job I was meant to be decorating after a builder (who, let's just say, didn't quite fit into the "excellent and professional" category) had supposedly finished.
This is just one small example of what I had to deal with, which is why the prep on this job took longer than the actual painting. He'd boxed some central heating pipes in to hide them. He'd also put new coving up round the ceiling (much of which I had to take down and re-do, but anyway). Both of these are good things to do. The problem was, he wasn't sure quite what to do when the two elements came together. Or rather, where they were meant to come together. So he just left it...
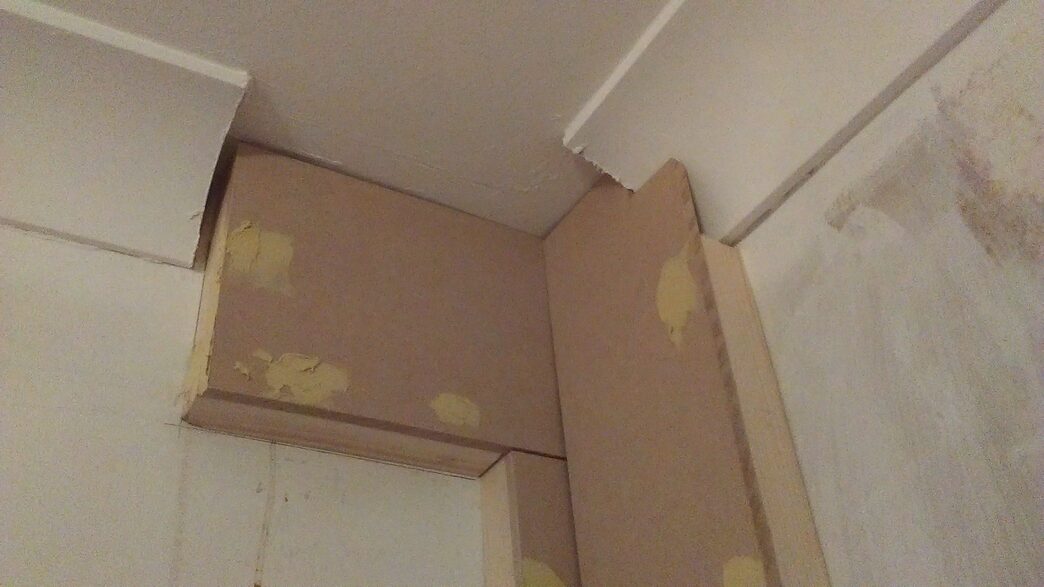
Now, there's no simple solution to magically make this look beautiful. It takes time and effort, some offcuts of coving, some filler, a bit of elbow grease and a fair amount of patience. And while the finished result isn't 100% perfect, it's pretty close. and certainly a lot closer than where we started from!
There are currently no blog comments.